How to Photograph a Solar Eclipse: Best Settings & Tips
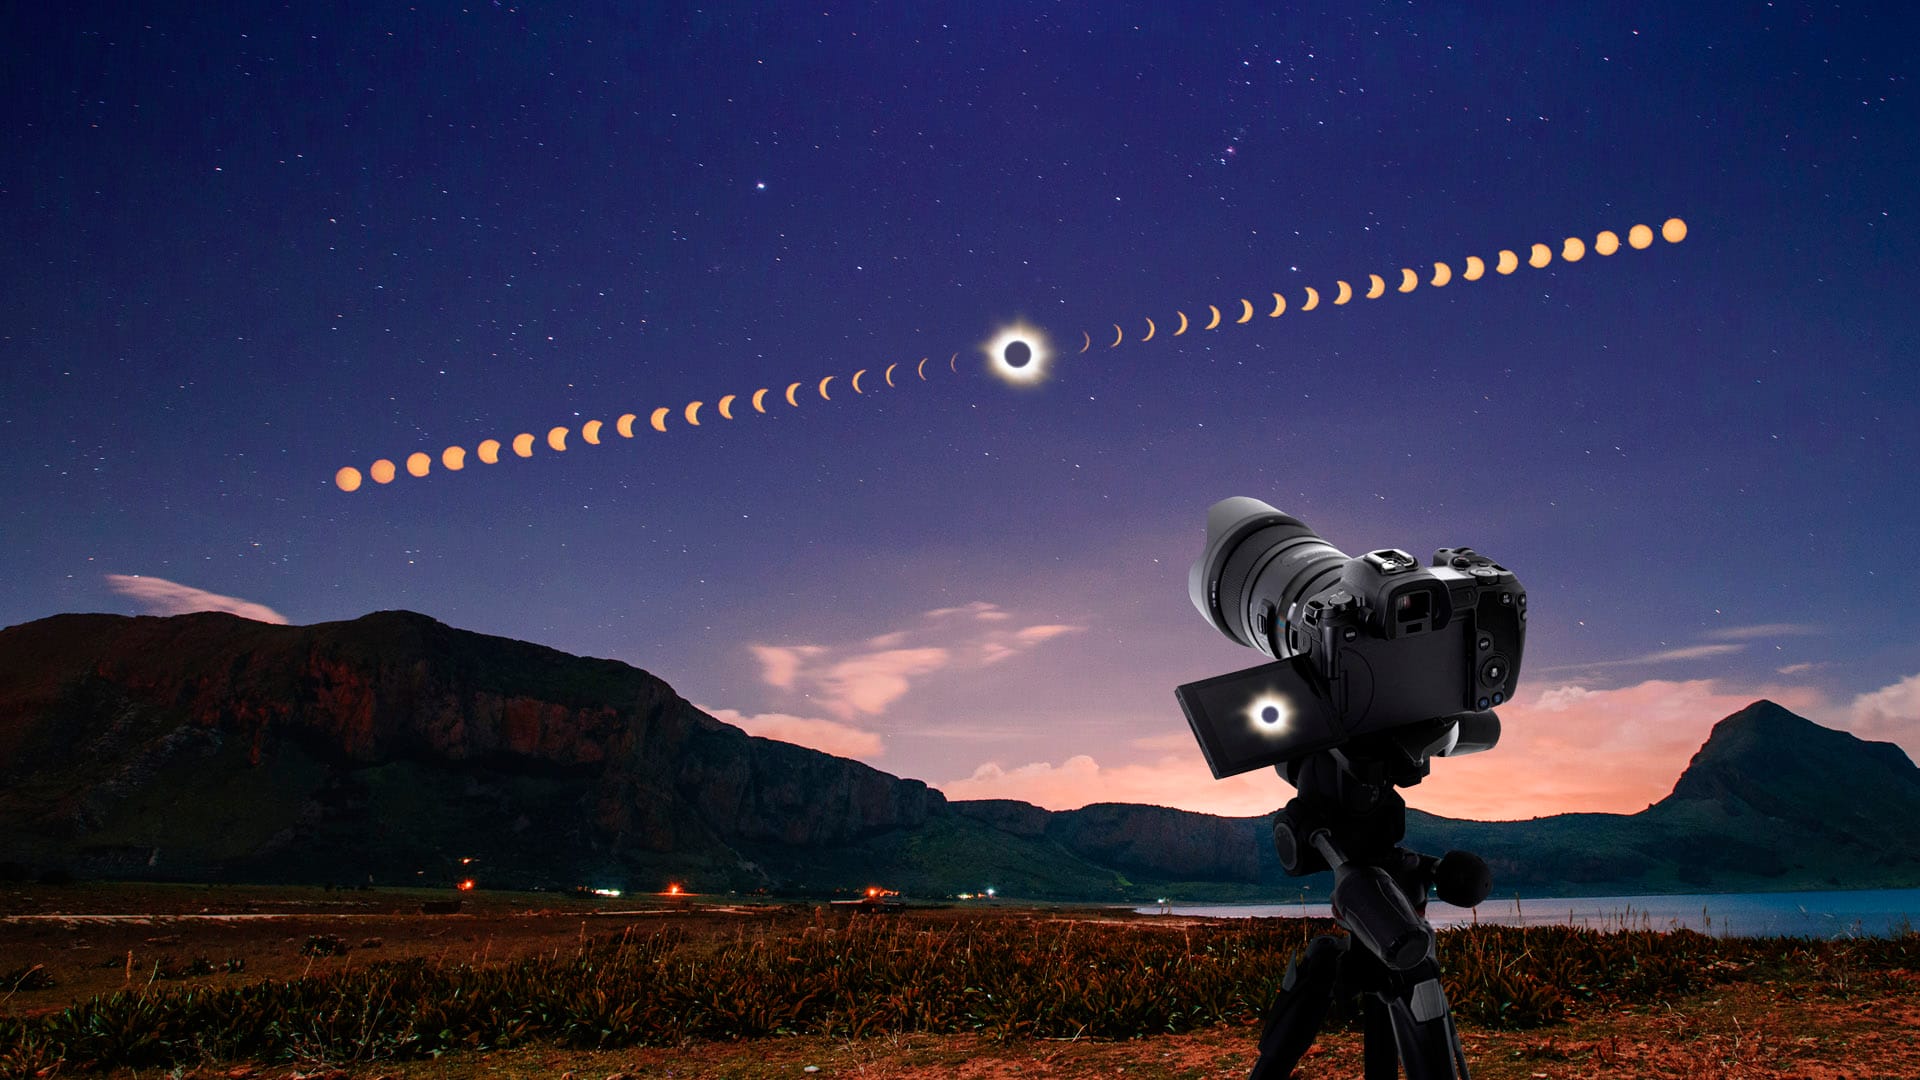
A solar eclipse can turn daylight into twilight, reveal the Sun’s pearly corona, and produce some of the most dramatic photographs you will ever take. It can also damage your eyes or equipment if you point unprotected optics at the Sun. That is what makes solar eclipse photography different from ordinary landscape or night-sky photography: you need to plan the location, rehearse the camera controls, and get the filter procedure right before the event begins.
Whether you are preparing for the August 12, 2026 total solar eclipse or another eclipse, this guide explains how to photograph a solar eclipse safely with an iPhone or Android phone, a DSLR or mirrorless camera, and a smart telescope. You will also find practical solar eclipse photography settings, lens recommendations, composition ideas, and a step-by-step Seestar S30 Pro (US Store | EU Store | Global Store) guide.
Use Sky Tonight to check the local eclipse phases, the Sun’s altitude and direction, and whether your location lies inside the path of totality.
Contents
- Solar eclipse photography: quick guide
- Solar eclipse photography safety: the filter comes first
- How to photograph each phase of a solar eclipse & best camera settings
- August 12, 2026 total solar eclipse photography
- What equipment do you need for solar eclipse photography?
- How to plan a solar eclipse photo
- Preparing for eclipse day: photography checklist
Solar eclipse photography: frequently asked questions
- How do you safely photograph a solar eclipse?
- Can I photograph a solar eclipse with an iPhone?
- Can a solar eclipse damage my phone camera?
- Do I need a solar filter for eclipse photography?
- Can I use eclipse glasses as a camera filter?
- Where should a solar filter be installed?
- What lens is best for solar eclipse photography?
- What are the best solar eclipse photography settings?
- How do I photograph a total solar eclipse?
- Can I remove the solar filter during an annular eclipse?
- Can I photograph a partial solar eclipse without a filter?
- Is the Seestar S30 Pro good for solar eclipse photography?
- How to photograph a solar eclipse: bottom line
Solar eclipse photography: quick guide
All the most important advice is here in one place:
- Use a proper front-mounted solar filter during every partial phase and throughout an annular eclipse.
- Remove the filter only during totality, only from inside the path of totality, and only after the Sun’s bright surface is completely covered.
- Use a phone for atmosphere and landscapes, a 200–600 mm lens for a larger solar disk, or a smart telescope for automatic locating and tracking.
- Shoot in RAW when possible.
- Use manual focus and check it on the solar limb or a visible sunspot.
- Bracket exposures during totality because the inner and outer corona differ enormously in brightness.
- Practice before eclipse day. Totality is too short for learning unfamiliar controls.
- Scout the horizon. This is essential when the eclipse happens close to sunrise or sunset.
Solar eclipse photography settings at a glance
| Eclipse phase | Solar filter | Starting settings | Best subjects |
|---|---|---|---|
| Partial phase | Keep on throughout | ISO 100, f/8–f/11, 1/500–1/4000 sec | Crescent Sun, sunspots, sequences |
| Annular phase | Keep on throughout | ISO 100, f/8–f/11, 1/500–1/4000 sec | Ring of fire, eclipse sequence |
| Baily’s Beads and Diamond Ring | Keep on until totality begins; replace before sunlight returns | Use burst mode and rapid bracketing | Beads, final flashes of sunlight |
| Totality | Remove only during totality | ISO 100–800, f/5.6–f/11, about 1/1000 sec to 1 sec or longer | Corona, prominences, dark lunar disk |
| Wide landscape | Filter the Sun during partial phases | Expose for the scene and bracket | Landmarks, people, twilight colors |
These are starting points, not universal values. The correct exposure depends on the filter, camera, focal length, haze, clouds, and the Sun’s altitude.
Solar eclipse photography safety: the filter comes first
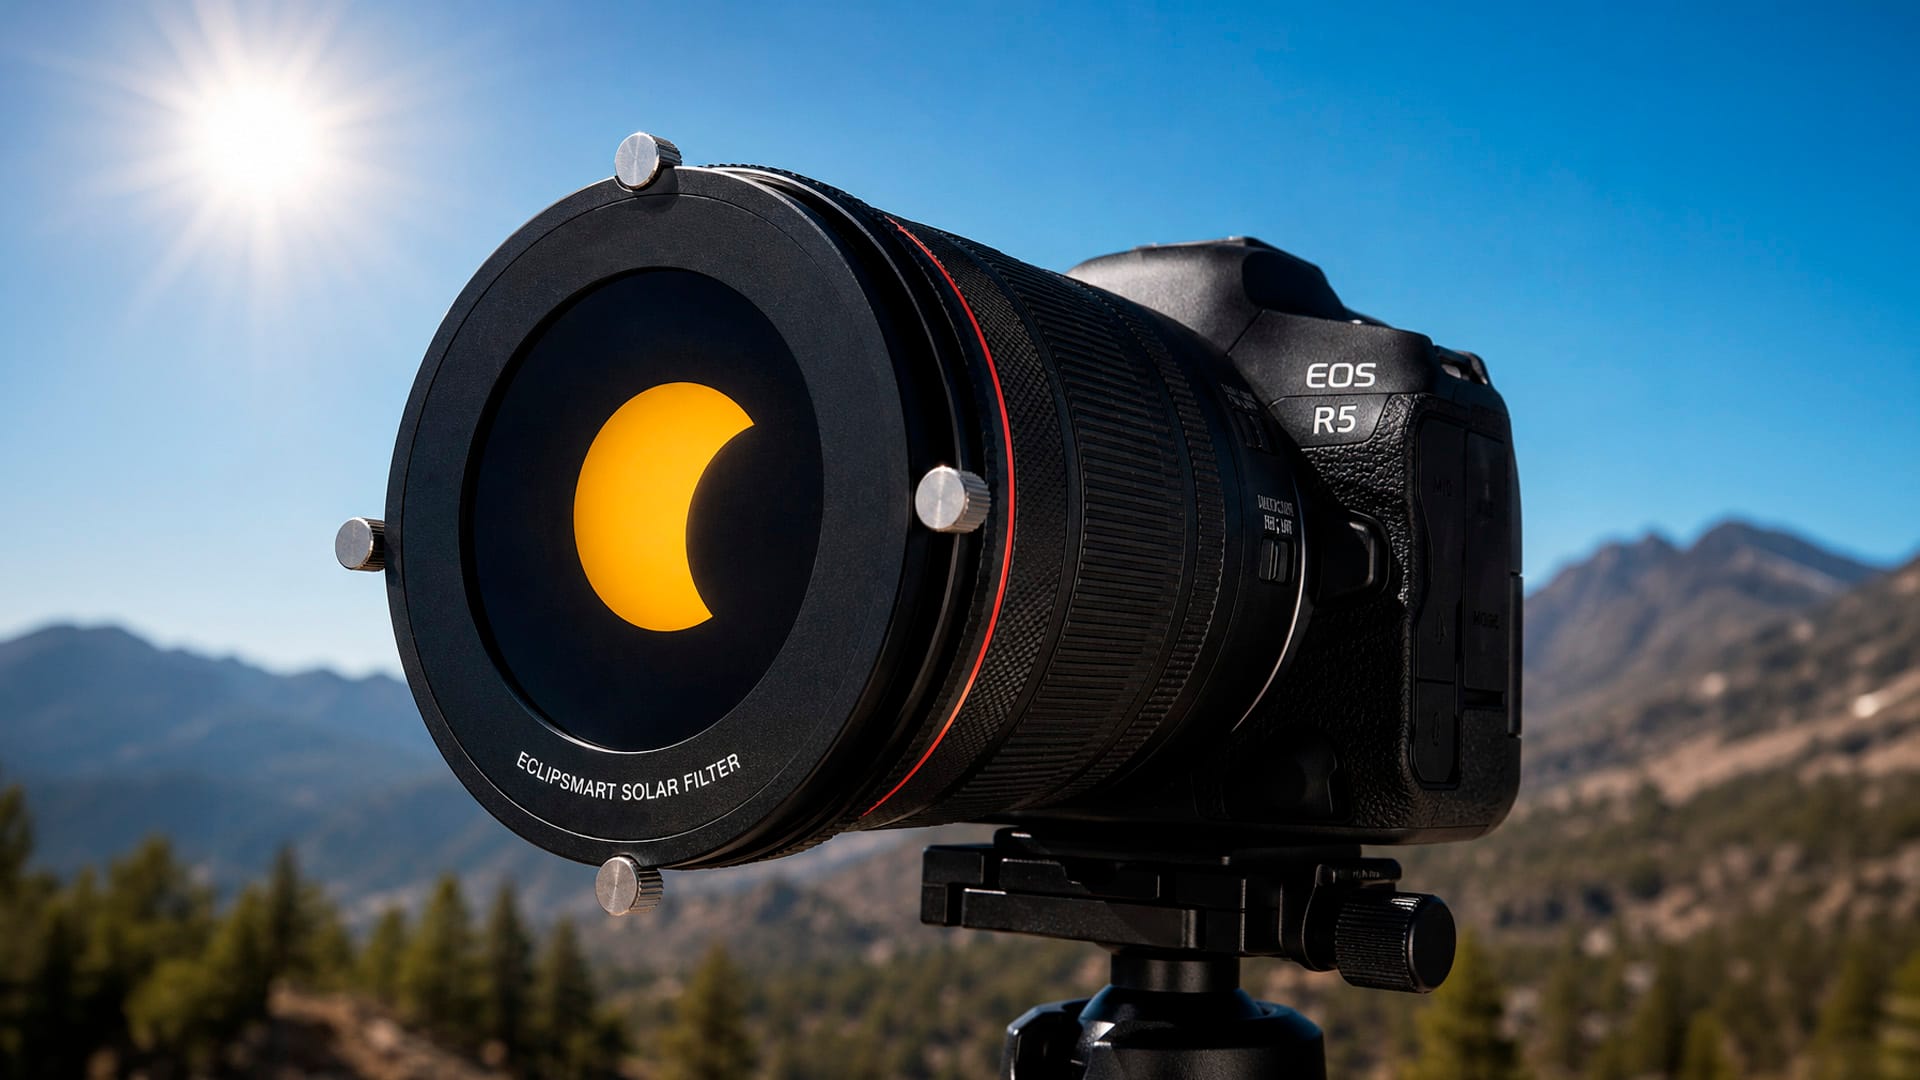
Never point an unfiltered camera, telescope, binoculars, or phone directly at the uneclipsed or partially eclipsed Sun.
Use a solar filter designed for cameras or telescopes from a reputable manufacturer. It must cover the front of the lens or telescope aperture, stopping intense light and heat before they enter the optical system.
Before the eclipse:
- Inspect the filter for scratches, holes, tears, loose edges, or other damage.
- Test the mounting and make sure wind or an accidental bump cannot dislodge it.
- Cover, remove, or safely filter any optical finder attached to the telescope.
- Do not use ordinary sunglasses, neutral-density filters, polarizing filters, photographic film, smoked glass, or homemade substitutes.
- Do not look through an unfiltered optical viewfinder.
- Never place eclipse glasses behind binoculars, a telescope, or a camera lens. Concentrated sunlight can damage the viewer and your eyes.
- Keep a lens cap nearby so you can cover the equipment while changing settings or solving a problem.
The solar filter may be removed only during totality, when the Moon completely covers the Sun’s bright surface. That filter-free phase exists only inside the path of totality.
Remove the filter after totality has clearly begun. Replace it before the first point of direct sunlight returns.
Outside the path of totality, the eclipse remains partial even when 99% of the Sun is covered. The filter must remain attached for the entire event. An annular eclipse also has no safe filter-free phase.
A camera filter protects the equipment, not your eyes. During every partial or annular phase, use safe eclipse glasses for direct viewing and never look through an unfiltered optical viewfinder.
How to photograph each phase of a solar eclipse & best camera settings
The best subject changes as the Moon crosses the Sun. Decide in advance which phases matter most to you so you are not constantly changing lenses, framing, and settings.
There is no single exposure that works with every solar filter, camera, and sky condition. Test your equipment on the ordinary Sun before the eclipse and treat the settings below as a starting point.
How to photograph a partial solar eclipse
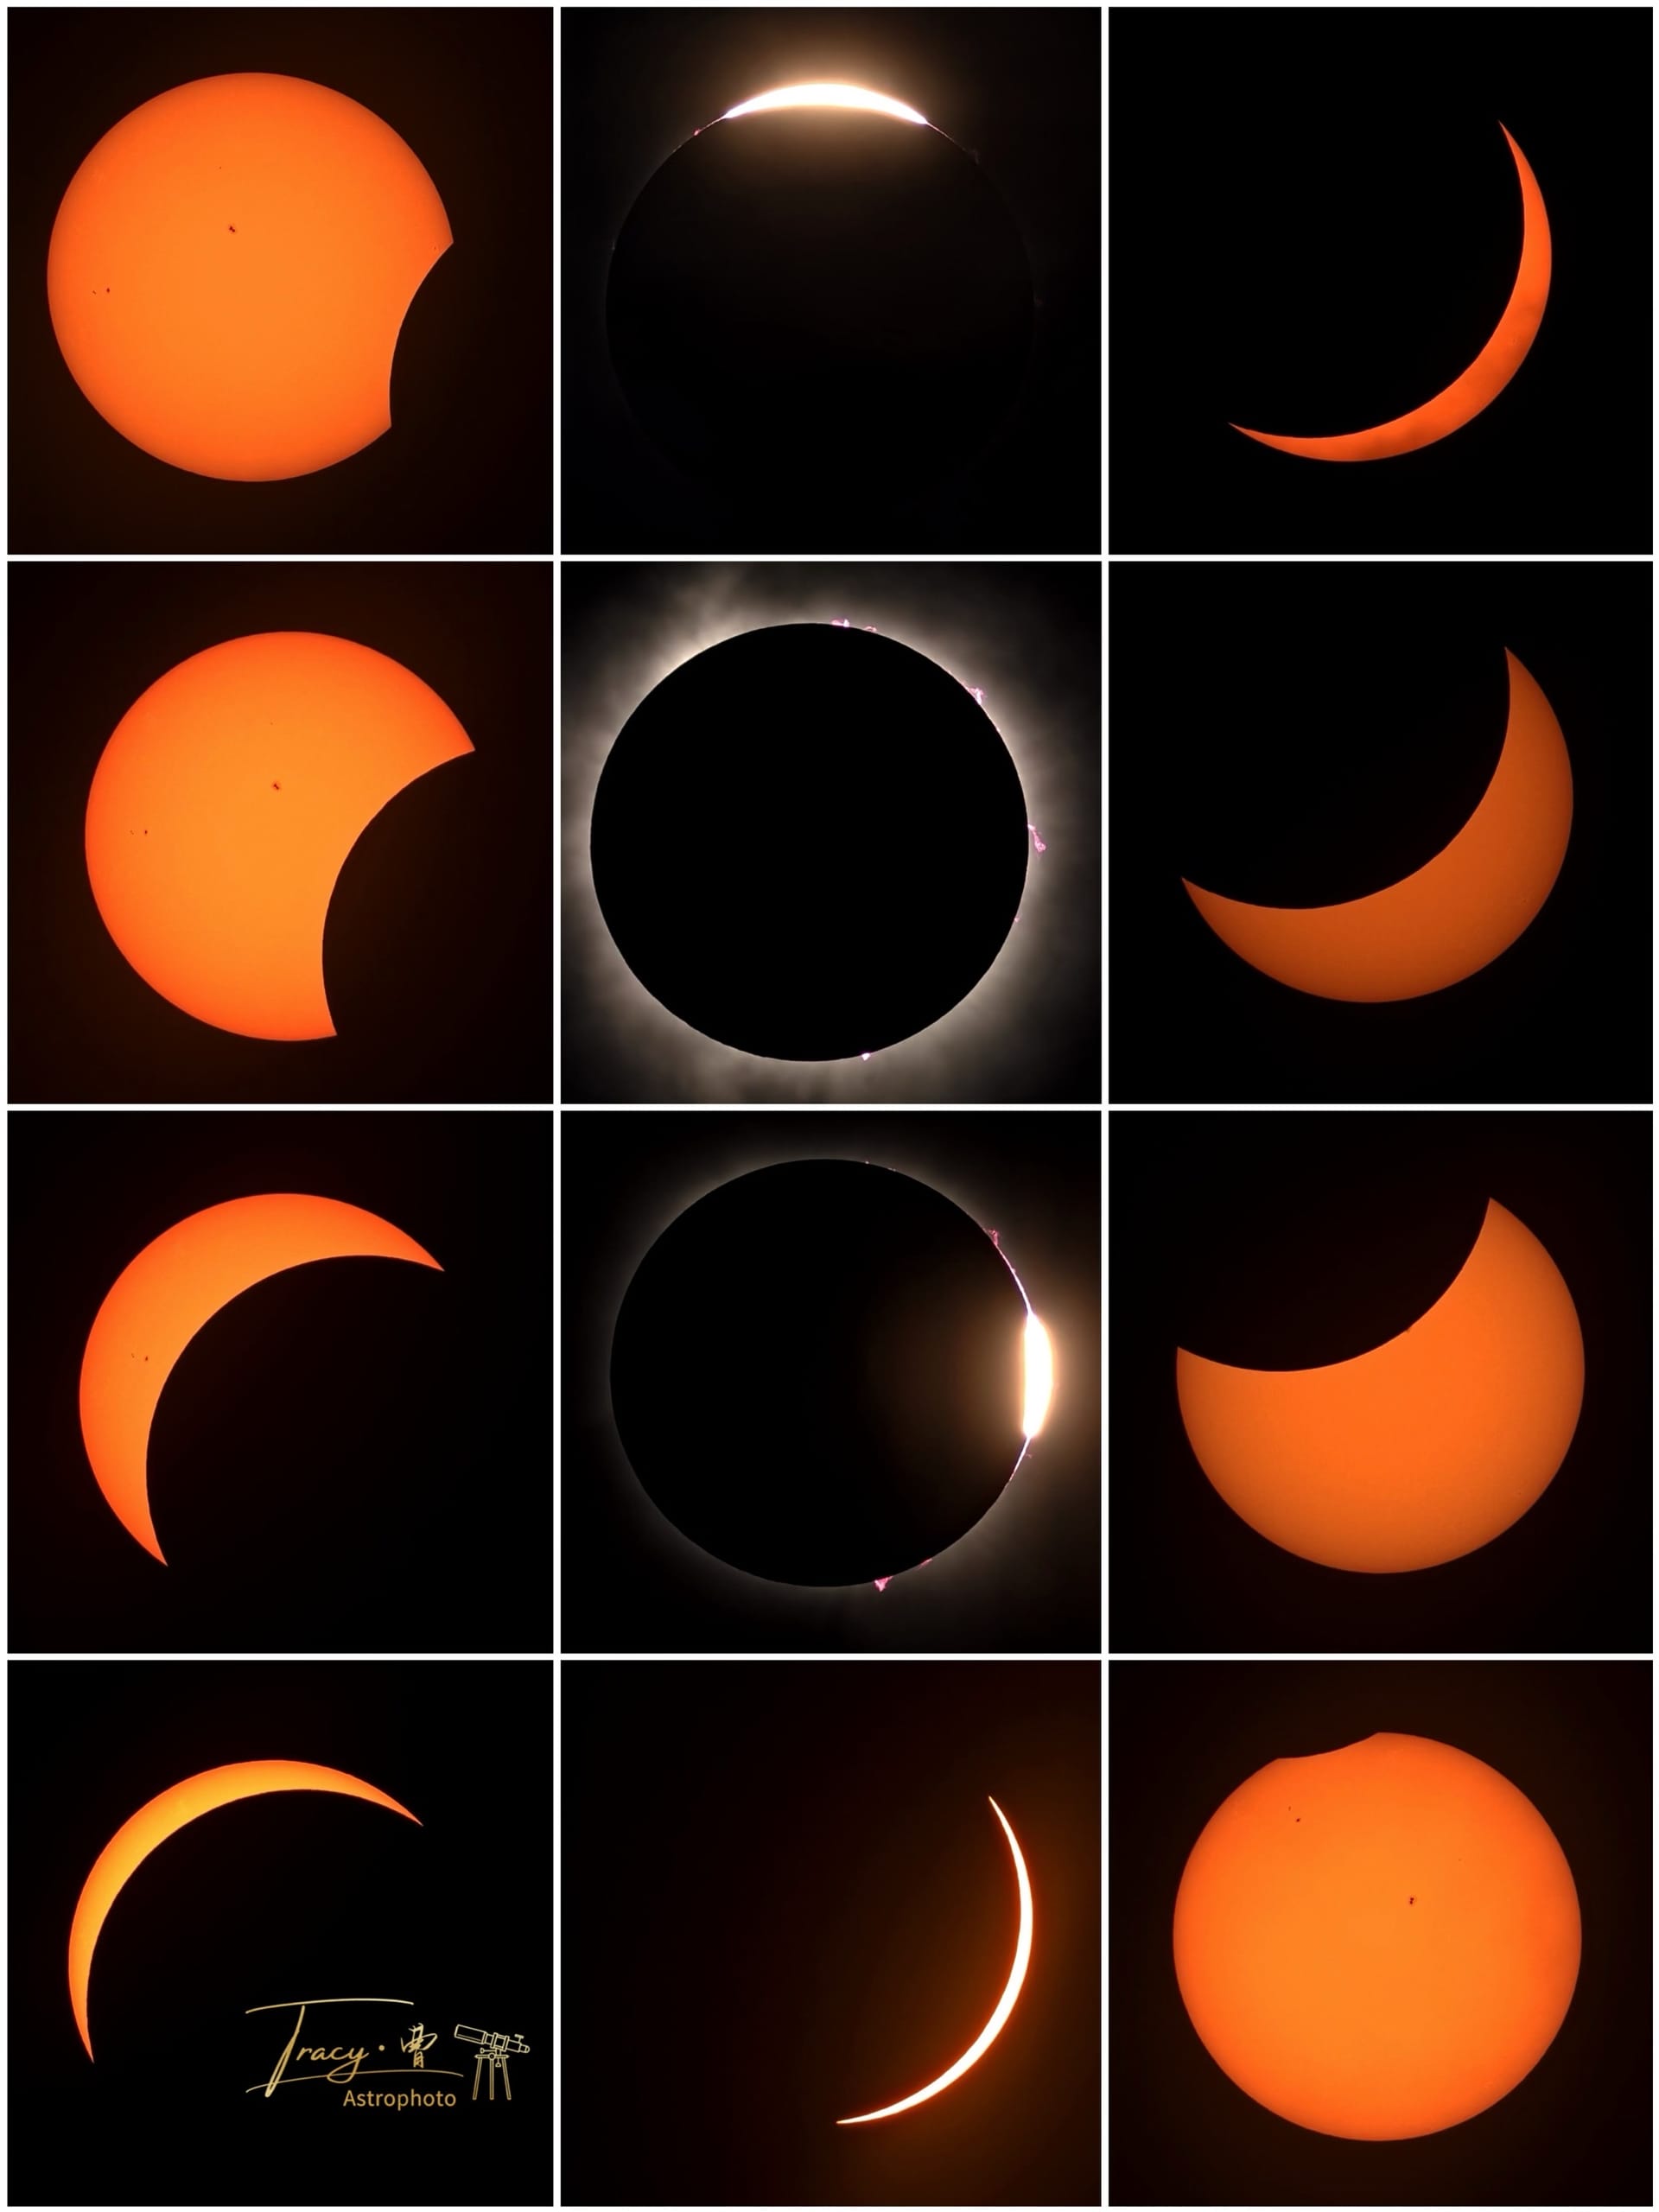
During a partial eclipse, the Moon covers only part of the Sun. The solar disk gradually changes into a crescent (depending on the depth of the eclipse) and then returns to its usual shape.
Keep the solar filter attached throughout the event. Good partial-eclipse subjects include:
- a close-up of the crescent Sun;
- sunspots crossed by the Moon’s silhouette;
- a sequence showing the changing shape of the Sun;
- a time-lapse of the complete partial phase;
- crescent-shaped projections beneath trees;
- a filtered Sun framed above a landscape or landmark.
The brightness of the visible solar surface changes much less than its apparent size, so one tested exposure can often work through most of the partial phase. Check the histogram occasionally, especially if haze or cloud changes.
How to photograph an annular solar eclipse
During an annular eclipse, the Moon appears slightly smaller than the Sun and leaves a brilliant ring around it at maximum eclipse.
The exposed solar surface remains dangerously bright during annularity. Keep the solar filter attached from beginning to end.
A fixed exposure and interval work well for an annular-eclipse sequence. Leave enough room in the composition for the Sun’s movement and include frames before, during, and after the ring phase.
Solar eclipse photography settings for partial and annular phases
Keep the solar filter attached.
Start with:
- Mode: Manual
- ISO: 100
- Aperture: f/8 to f/11
- Shutter speed: about 1/500 to 1/4000 sec
- Focus: Manual or carefully locked autofocus
- White balance: Daylight or another fixed value
- File format: RAW
- Drive mode: Single frame, interval shooting, or a short burst
The filter transmission, lens aperture, haze, and Sun altitude all affect exposure. Photograph the uneclipsed Sun during a test session and try a range of shutter speeds.
Check the histogram and the solar surface. The Sun should have a defined edge and, when present, visible sunspots. If it looks like a smooth, featureless disk, reduce the exposure.
Use a fixed white balance and manual exposure for a consistent sequence. Automatic settings can make the Sun change color or brightness from frame to frame.
How to photograph a total solar eclipse
A total eclipse has two very different photographic conditions:
- The partial phases, photographed through a solar filter.
- Totality, photographed without the filter after the bright solar surface is fully hidden.
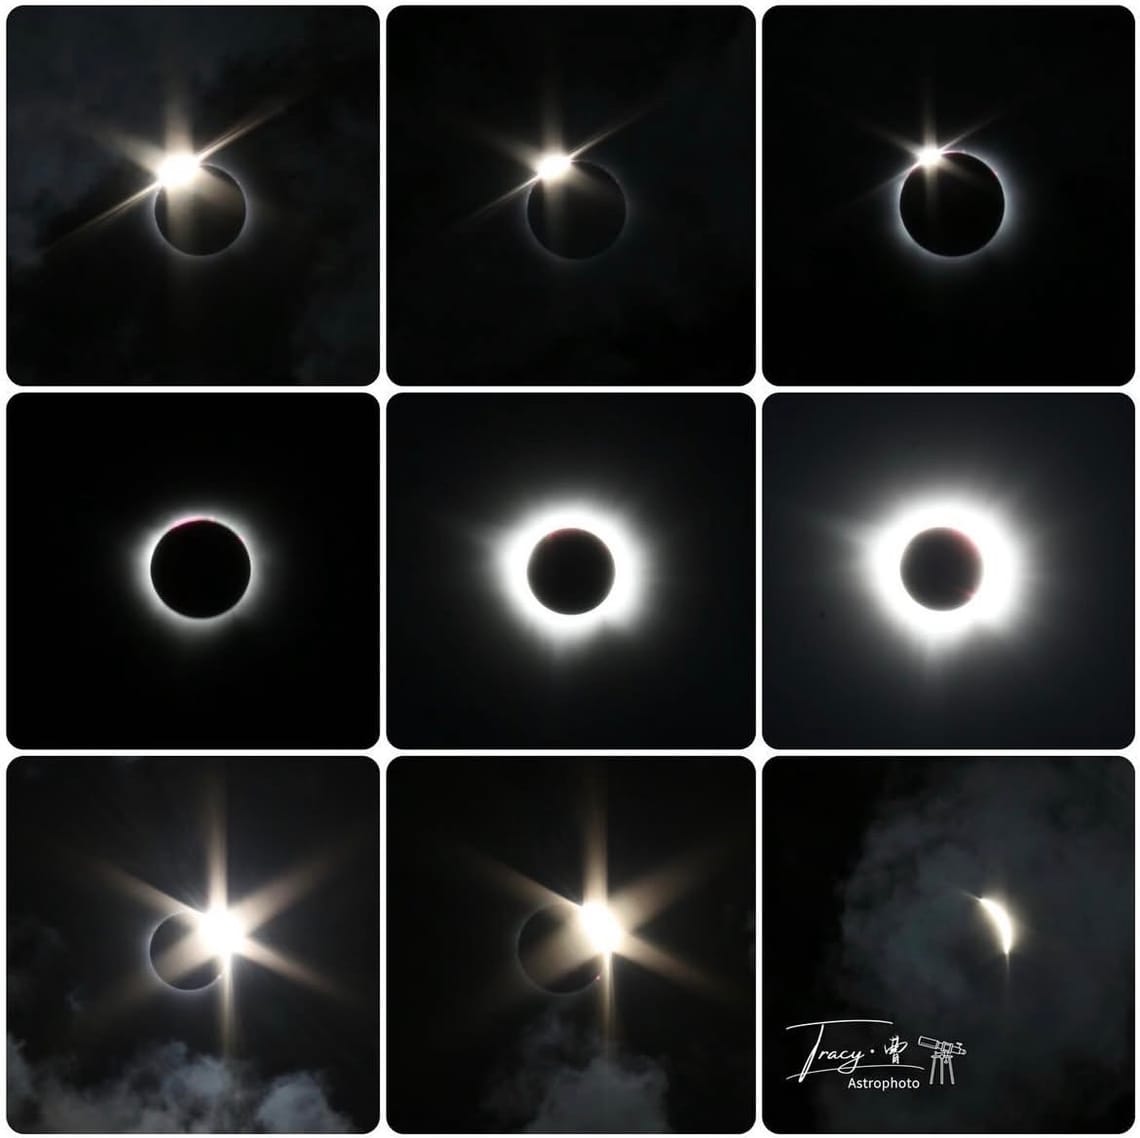
During totality, you can capture:
- the solar corona;
- pink or red prominences;
- the black silhouette of the Moon;
- the darkened sky and glowing horizon;
- bright planets and stars near the Sun;
- reactions from observers around you.
Just before and after totality, sunlight passing through valleys along the Moon’s edge can form Baily’s Beads. A final or first burst of sunlight beside the corona creates the Diamond Ring effect.
These transitions last only seconds. Use a rehearsed filter procedure, burst mode, and exposure bracketing rather than improvising at the last moment.
Total solar eclipse photography settings
During totality, the corona spans a huge brightness range. The bright inner corona and prominences need fast shutter speeds, while the faint outer corona needs much longer exposures.
After totality has clearly begun and the filter has been safely removed, try:
- ISO: 100–800
- Aperture: f/5.6 to f/11
- Shutter speeds: about 1/1000 sec to 1 sec or longer
- File format: RAW
- Drive mode: High-speed burst or automatic bracketing
A practical approach is to choose one aperture and ISO, then cycle through shutter speeds. Fast exposures preserve prominences and the inner corona. Longer exposures reveal streamers farther from the Sun but overexpose the inner region.
You can later combine a well-aligned bracketed sequence into a high-dynamic-range corona image.
Test how quickly your camera writes a burst to the memory card. A slow card or full buffer can stop shooting at the worst possible moment.
Settings for Baily’s Beads and the Diamond Ring
Baily’s Beads and the Diamond Ring occur around the beginning and end of totality and may last only seconds.
Prepare in advance:
- Set a fast burst mode.
- Program exposure bracketing if your camera supports it.
- Keep the aperture and ISO fixed so you only need to vary shutter speed.
- Know exactly when and how the filter will be removed and replaced.
- Leave space around the Sun for the corona.
The beads are much brighter than the corona, so a single exposure cannot capture every feature. Rapid bracketing gives you a better chance of recording both the bright solar points and the surrounding glow.
Do not remove the filter early simply because the scene has become dark. Follow the actual contacts and your rehearsed procedure.
Settings for wide-angle eclipse landscapes
A landscape photograph has two very different brightness problems: the Sun is extremely bright during the partial phases, while the scene becomes much darker during totality.
If the camera is aimed directly at the visible Sun during a partial phase, use a proper front-mounted solar filter. A filter large enough for a wide-angle lens may darken the entire frame, so many photographers create separate filtered solar frames and wider landscape images (without the Sun).
During totality:
- remove the filter only after full totality begins;
- expose for the sky and foreground, not only the corona;
- use exposure bracketing;
- avoid clipping the bright horizon;
- include silhouettes to simplify the dynamic range.
A second camera dedicated to the wide scene is often easier than repeatedly changing one setup.
August 12, 2026 total solar eclipse photography
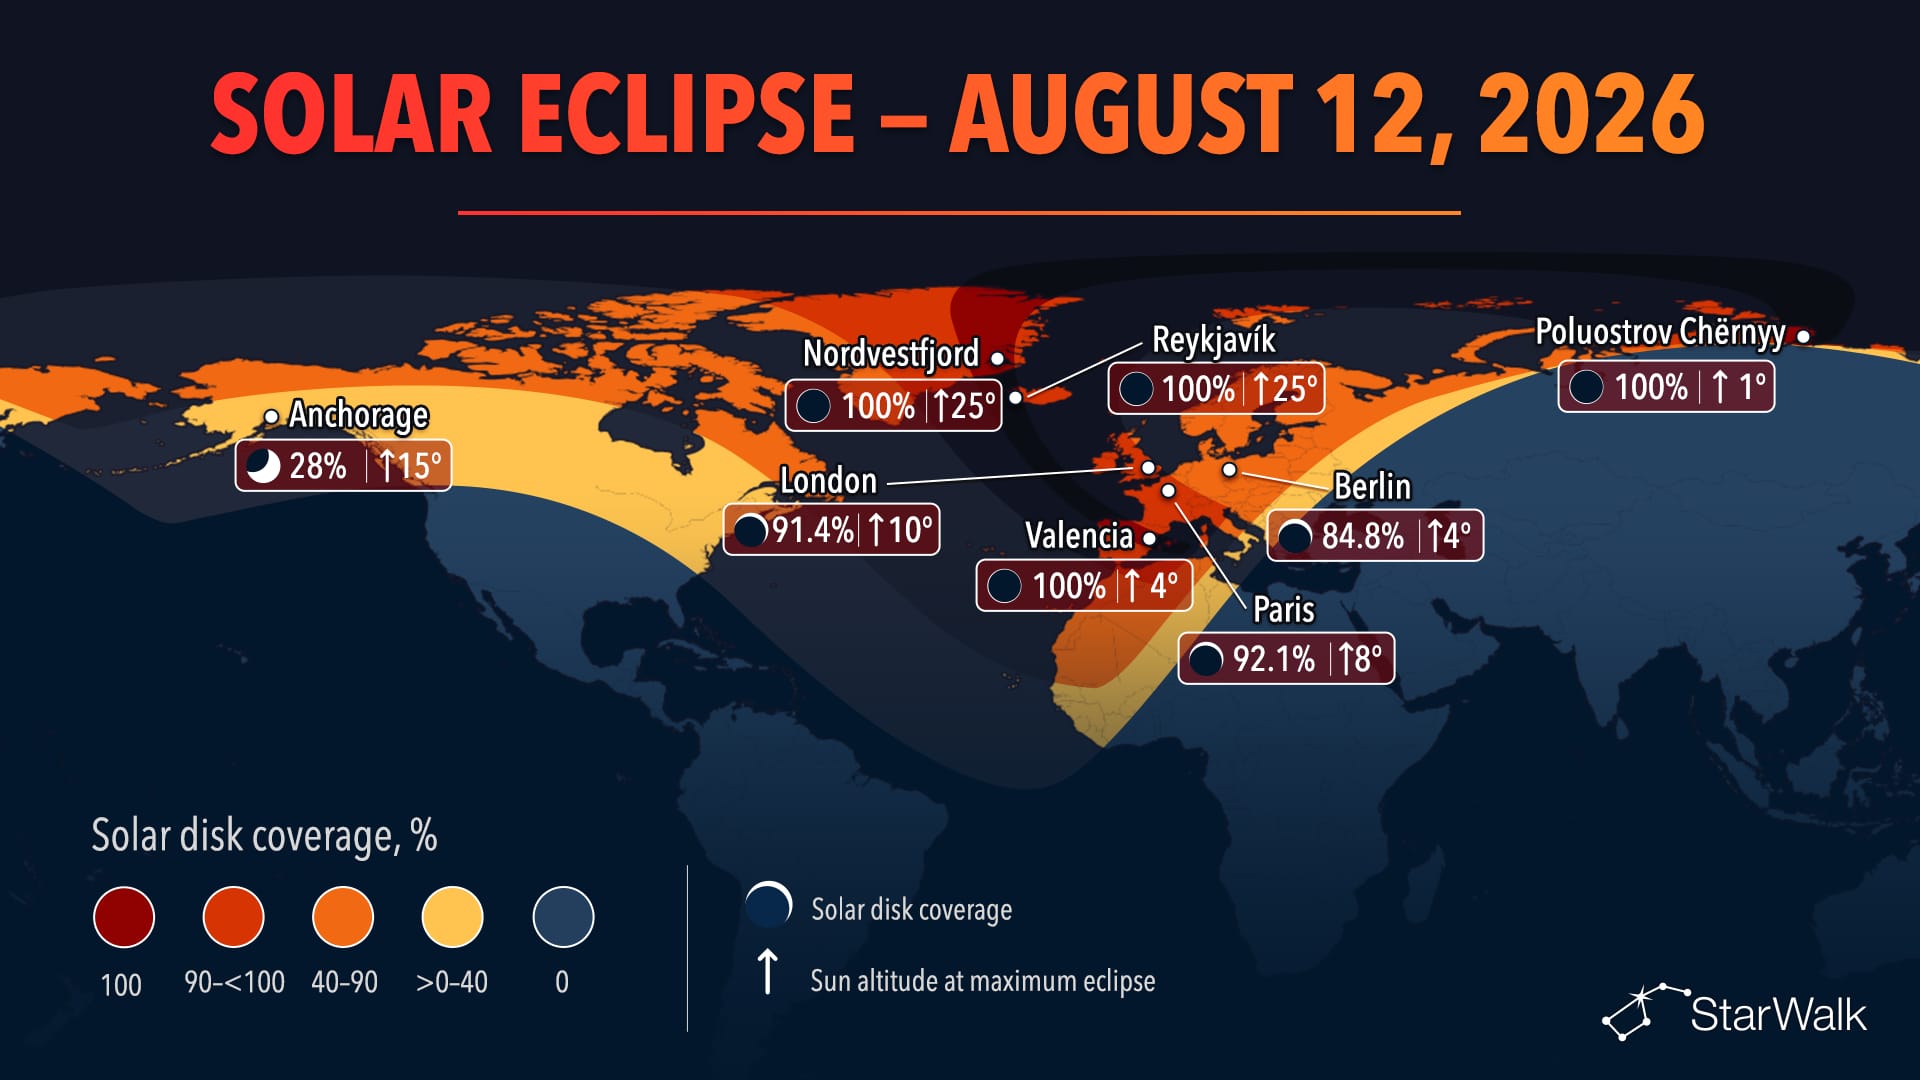
The August 12, 2026 total solar eclipse will cross Arctic Russia, Greenland, Iceland, a tiny part of northeastern Portugal, northern Spain, and the Balearic Islands. A partial eclipse will be visible across much of Europe, northwestern Africa, and parts of North America.
The longest possible totality will last about 2 minutes 18 seconds, although most populated observing locations will experience less.
For photographers, this eclipse is especially interesting because conditions change dramatically along the path.
Iceland: The Sun will be comfortably above the western horizon in the main viewing areas, making it easier to frame and track than in Spain. The main risk is the cloud cover.
Northern Spain: August weather is generally more promising, but the eclipsed Sun will sit only a few degrees above the western horizon. This creates spectacular landscape possibilities — and a serious risk that hills, trees, buildings, haze, or a low cloud bank will hide totality.
Balearic Islands: The Sun will be extremely low. A sea horizon can produce a remarkable sunset-eclipse composition, but there will be little margin for obstruction.
Greenland: The eclipse can be photographed higher in the sky against dramatic Arctic scenery, but transport, weather, power, and backup-site logistics require more preparation.
Outside the path of totality: Keep the solar filter attached throughout the eclipse. A 99% partial eclipse will not reveal the corona and is not safe to photograph without a filter.
Use the detailed August 12, 2026 total solar eclipse guide to compare locations, visibility maps, local circumstances, and the Sun’s height above the horizon.
What equipment do you need for solar eclipse photography?
Almost any modern camera can record some part of an eclipse. The right equipment depends on the photograph you want: a close-up of the Sun, a wide landscape, a sequence, or a record of the people and atmosphere around you.
How to photograph a solar eclipse with an iPhone or Android phone
A phone is best for wide, atmospheric eclipse photography. Use it for:
- people watching through eclipse glasses;
- the changing light and colors around the horizon;
- the eclipsed Sun above a building, monument, mountain, or coastline;
- crescent shadows beneath trees;
- video of the crowd and landscape during totality;
- a wide composition that shows the eclipse as part of a larger scene.
For a direct image of the solar disk during any partial phase, securely cover all phone camera lenses with a suitable solar filter. This becomes even more important when using an optical telephoto camera, an external lens, or prolonged video recording.
For better iPhone or Android eclipse photos:
- Turn off the flash.
- Clean the camera lenses.
- Use a tripod, clamp, or solid support.
- Use optical zoom and avoid extreme digital zoom.
- Tap and hold to lock focus and exposure when the camera app allows it.
- Reduce the exposure until the filtered Sun has a clean edge instead of a featureless white blob.
- Use RAW or a manual camera app if available.
- Include an interesting foreground because the Sun will appear small in a normal phone frame.
- Record short clips instead of one very long video if heat or storage is a concern.
During totality, remove the filter only after the Sun is fully covered and only if you are inside the path of totality. A phone can capture the dark sky, bright horizon, and inner corona, but it may struggle to reproduce the full structure of the corona without manual exposure control.
DSLR or mirrorless camera with a telephoto lens
For a recognizable solar disk, start at about 200 mm full-frame equivalent. The Sun will still look relatively small, but its crescent shape will be clear.
A 400–600 mm lens is a practical choice for close-up solar eclipse photography. It makes the Sun much larger while leaving room for tracking errors and, during totality, the inner corona.
Use a shorter lens when you want to include the landscape:
- 14–35 mm: wide landscape, crowd, sky, and horizon;
- 50–135 mm: landmark or environmental composition;
- 200–600 mm: large solar disk and eclipse detail;
- Very long focal lengths: more detail, but harder tracking and a greater risk of cropping the corona.
For a camera setup, bring:
- a sturdy tripod;
- a remote release, intervalometer, or short self-timer;
- a securely mounted front solar filter;
- Live View or an electronic viewfinder;
- manual exposure control;
- manual focus or locked autofocus;
- enough empty space in the frame for drift and the corona;
- a second camera or phone if you also want wide shots and reactions.
Before eclipse day, verify that the Sun fits comfortably inside the frame and that you can remove and replace the filter without moving the camera.
Smart telescope
A smart telescope simplifies solar eclipse photography by handling several difficult tasks. It can locate the Sun, center it, track it, focus, and record a time-lapse through a phone app.
That is especially useful during a long partial phase, when a fixed camera would otherwise need repeated reframing.
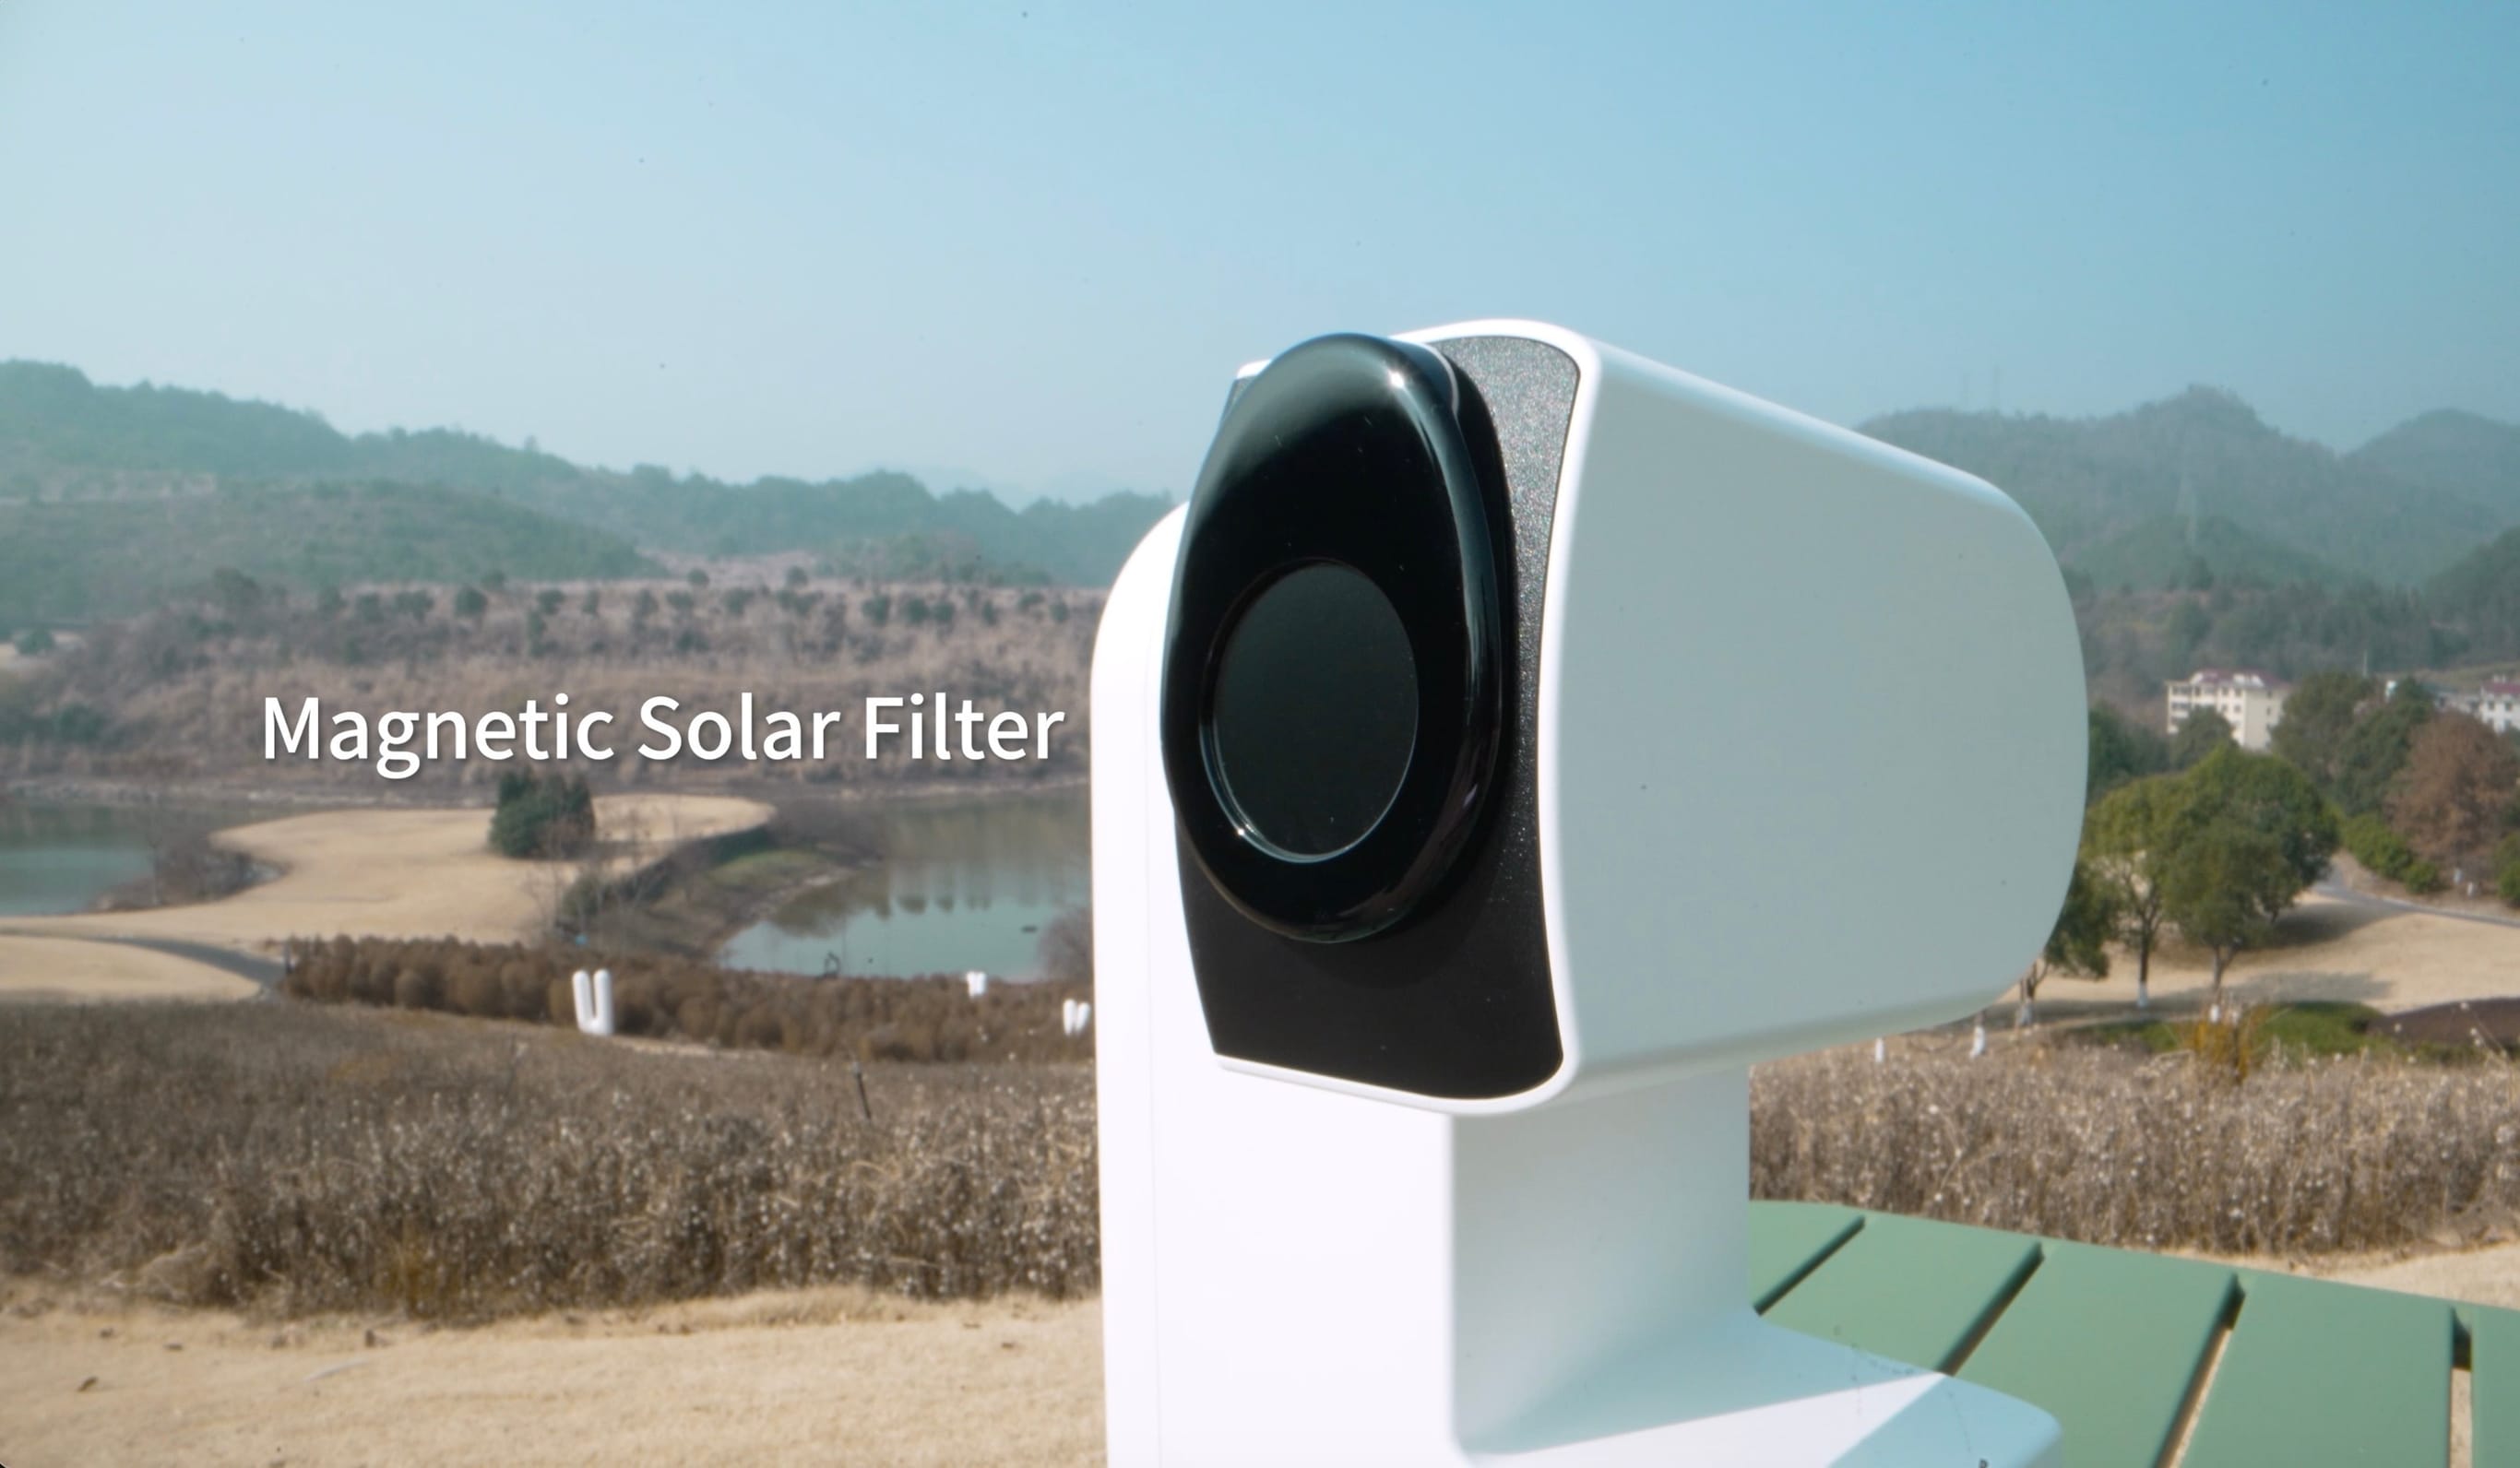
A model such as Seestar S30 Pro (US Store | EU Store | Global Store) offers app control, automatic locating and tracking, autofocus, exposure adjustment, photo and video modes, and time-lapse recording. Use only the dedicated solar filter intended for the telescope and install it before the instrument begins solar imaging.
How to plan a solar eclipse photo
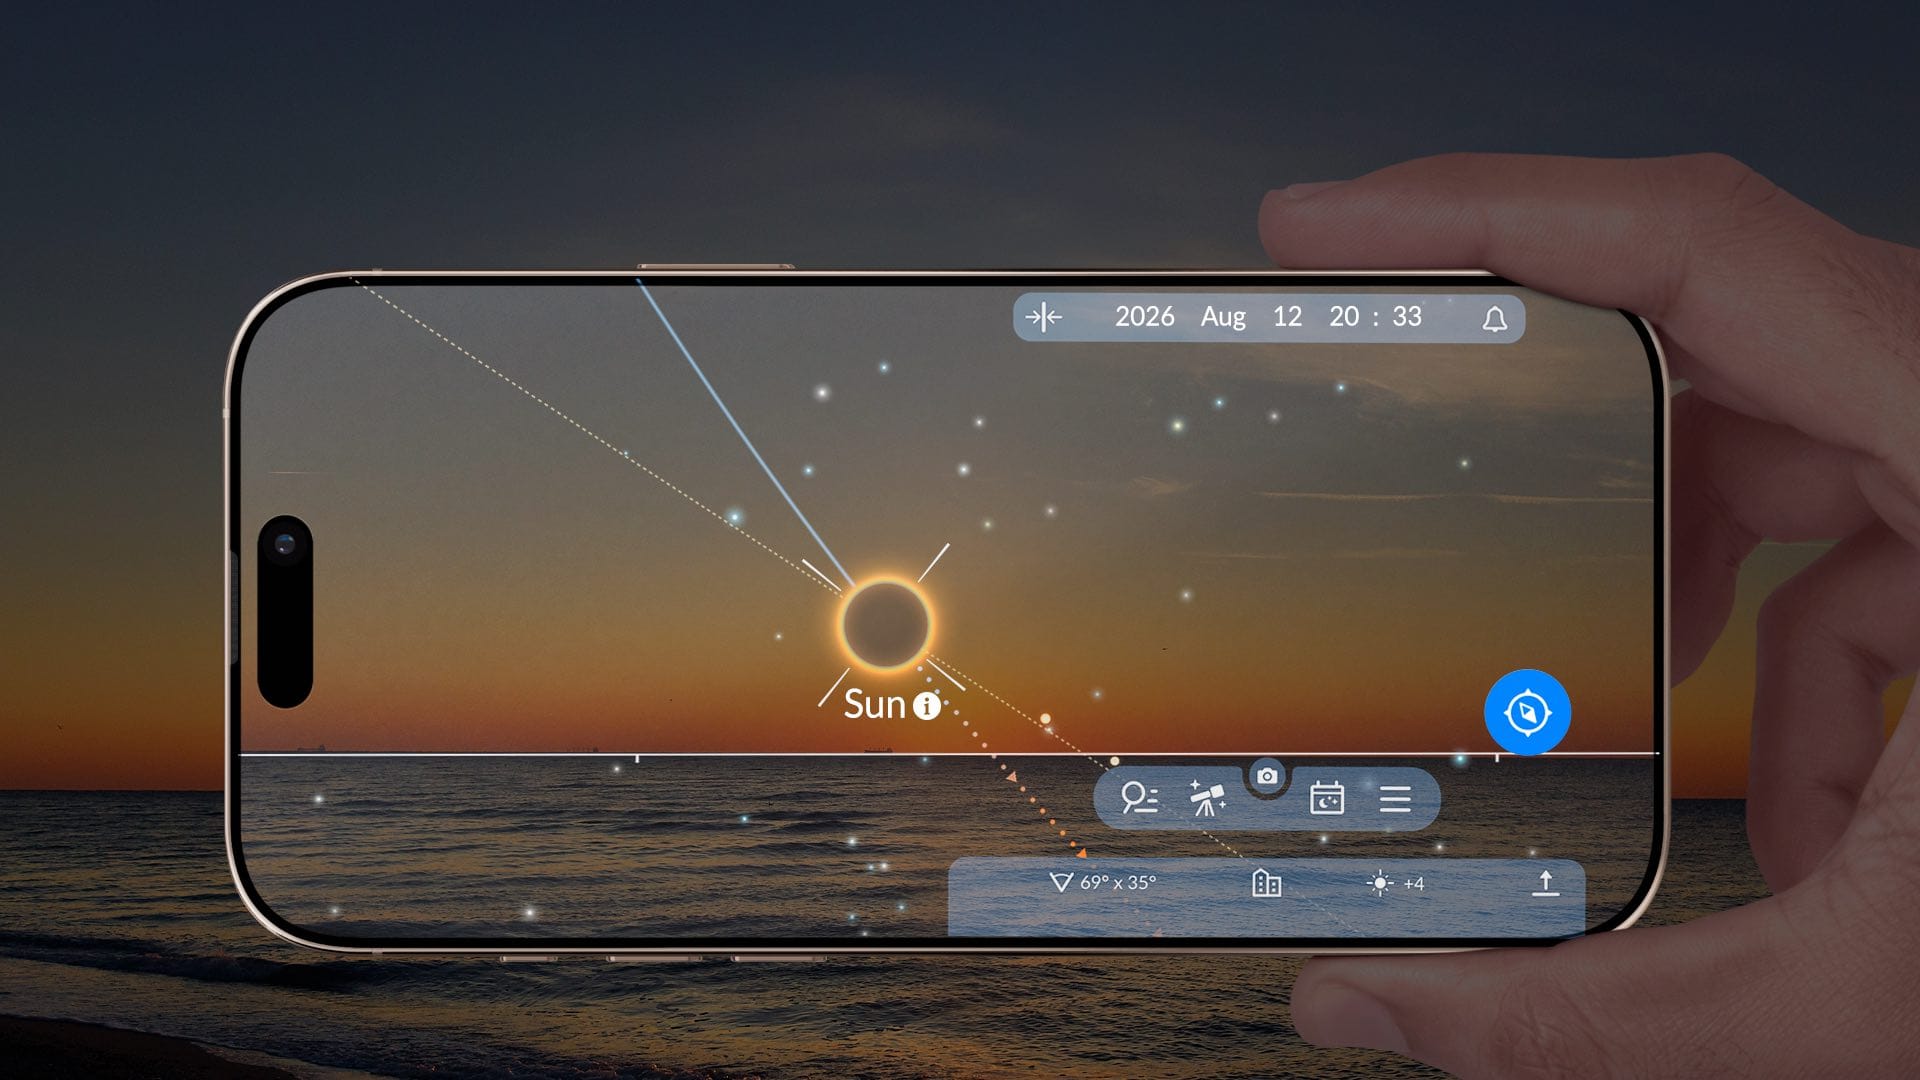
A technically perfect camera setup is useless if the Sun disappears behind a building or hill during the main phase.
Use Sky Tonight to check the eclipse from your exact location:
- Open the Calendar.
- Find the solar eclipse event.
- Check whether the eclipse is total, annular, or partial at your location.
- Note the local beginning and ending times.
- Check the Sun’s altitude and direction.
- Use Time Machine to move to the eclipse date and time.
- Open AR mode and point the phone toward the real horizon.
- Set a reminder before the eclipse begins.
Visit the site at roughly the same time of day before the eclipse. Look for trees, rooftops, ridges, streetlights, fences, and other obstructions. Confirm that you can legally access the location and safely place a tripod without blocking a road or path.
For the August 12, 2026 eclipse in Spain and the Balearic Islands, the most important location feature is a completely open western horizon.
How to photograph a solar eclipse with Seestar S30 Pro
A smart telescope simplifies the mechanics, but it does not remove the need for practice. Run through the complete workflow on an ordinary sunny day before the eclipse.
App labels may change after software updates, so check the current Seestar interface and manufacturer instructions shortly before the event.
1. Choose and prepare the location
Place the telescope on firm, level ground where the Sun will remain visible for the entire recording period. Set up early enough to test tracking, exposure, storage, battery level, app connection, and filter mounting.
For the August 12, 2026 eclipse in Spain, check the western horizon carefully. A balcony edge, tree, ridge, or distant building may block the low Sun even if the site seems open at midday.
2. Connect and level the telescope
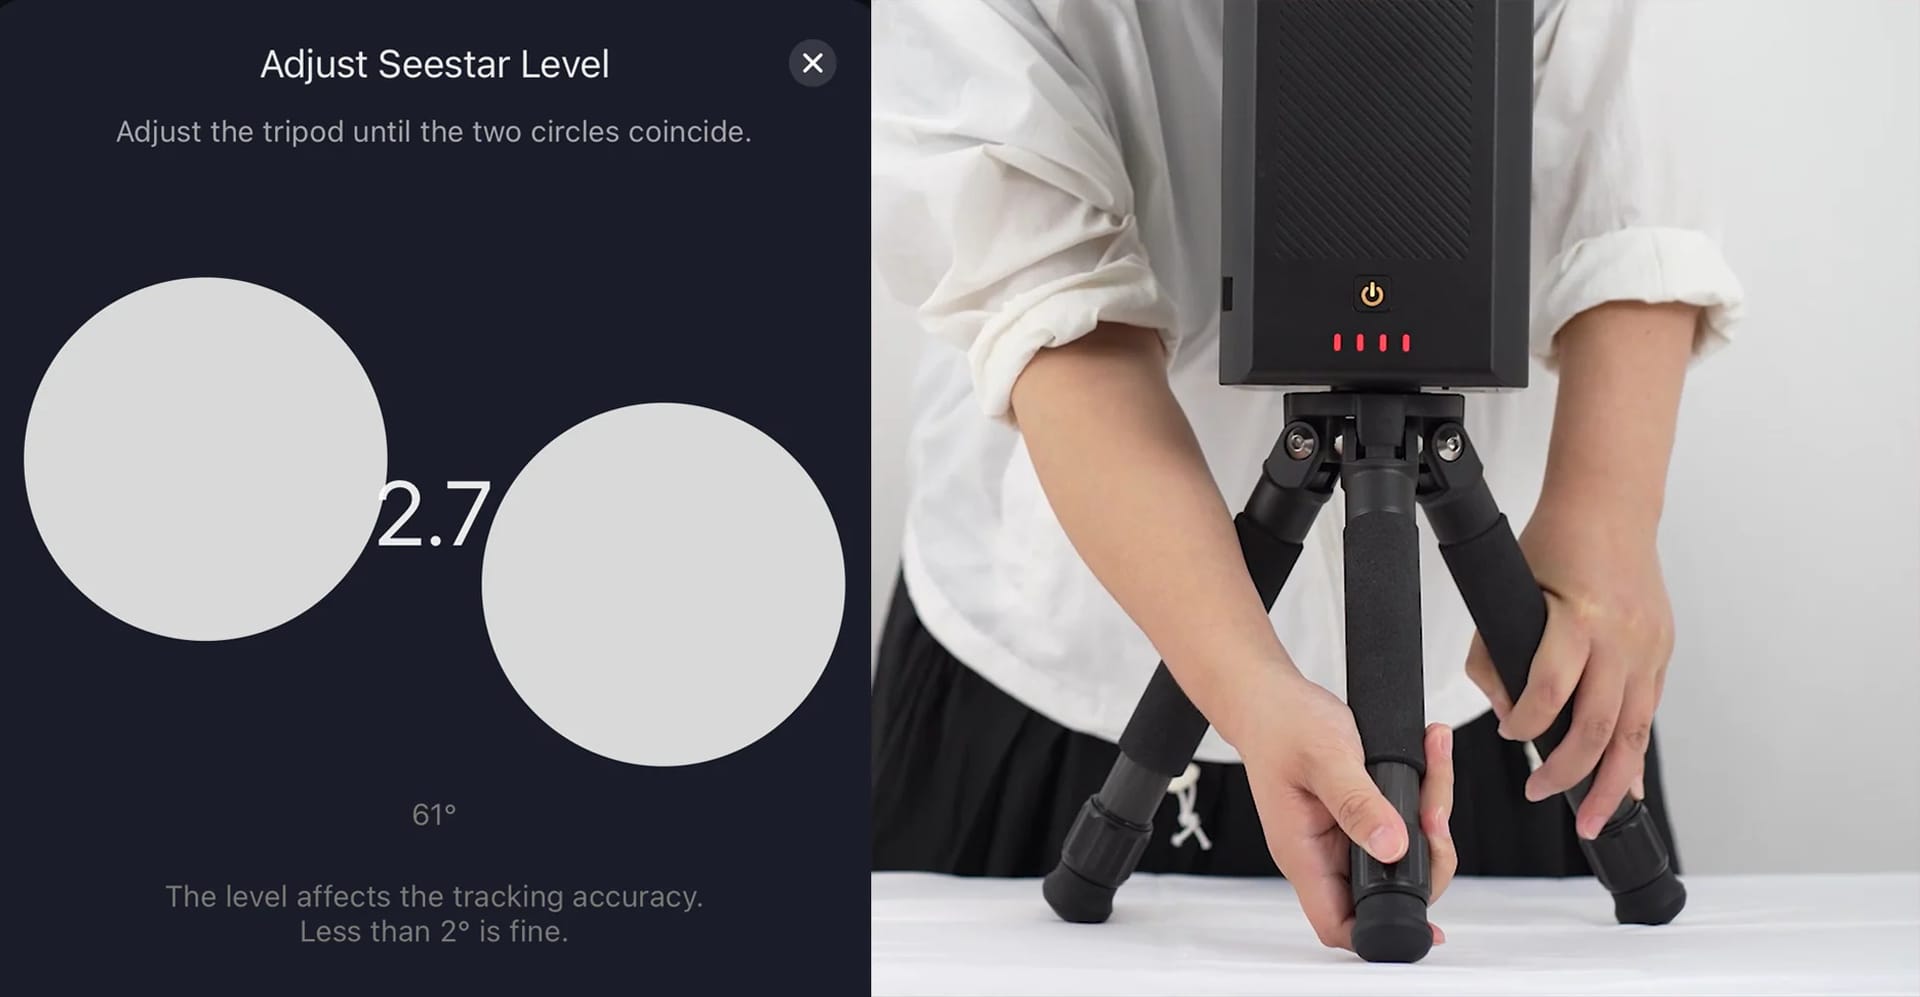
Connect Seestar to your phone or tablet, then open: Me → Advanced Features → Level & Compass Calibration → Adjust Level
Adjust the tripod legs until the two circles in the leveling interface overlap.
Accurate leveling helps the telescope locate and track the Sun. Compass calibration is usually needed only when the app requests it or when automatic positioning is inaccurate. During calibration, move away from vehicles, large metal structures, magnets, and reinforced concrete when possible.
3. Install the dedicated solar filter
Enter Solar System mode and select the Sun. Follow the prompt that moves the optical tube into a convenient position, then install the dedicated solar filter securely.
Inspect the filter and confirm that it is fully seated before continuing. Do not start locating or imaging the Sun without it.
4. Locate, center, and focus on the Sun
Tap the current GoTo or Sun-locating control. After the telescope finds the Sun:
- confirm that the full solar disk is visible;
- make small manual corrections if necessary;
- enable Center Target;
- tap near the solar limb or a visible sunspot;
- run AF and inspect the edge of the Sun.
Once tracking is active, the telescope should keep the Sun in the frame while you change recording and exposure settings.
5. Choose automatic or manual exposure
Open Adjust to select automatic or manual exposure.
Auto mode is the simpler choice. It reacts to changing brightness and reduces the need for constant intervention.
Manual mode locks exposure time and gain, producing more consistent partial-phase frames. However, one manual setting will not cover the dramatic change around totality, so you must monitor the preview and adjust it as the eclipse progresses.
During the filtered partial phase, aim for:
- a crisp solar limb;
- visible sunspots when present;
- no large overexposed area;
- a dark background;
- consistent brightness from frame to frame.
6. Record photos, video, or a timelapse
Seestar offers Photo, Video, and Time-lapse modes.
A time-lapse is the easiest way to record the full progression. The manufacturer’s eclipse workflow recommends a 2-second interval as a practical starting point. Use this formula to estimate the result:
Final video length = number of captured frames ÷ export frame rate
For an 83-minute recording:
- a 1-second interval produces about 4,980 frames;
- a 2-second interval produces about 2,490 frames;
- a 5-second interval produces about 996 frames.
At 30 frames per second, those become final videos of approximately:
- 2 minutes 46 seconds;
- 1 minute 23 seconds;
- 33 seconds.
A 1–2 second interval looks smoother but uses more storage. A 3–5 second interval creates a shorter file but may make the rapid transitions around totality feel abrupt.
Use the snapshot or share control, when available, to save an important individual frame while the timelapse continues.
7. Handle totality carefully
If you are inside the path of totality, decide before the eclipse whether you will attempt to record the corona without the filter. A filtered image will become extremely dark during totality and will not show the faint outer corona well. However, removing and replacing the filter introduces risk and must be rehearsed.
Remove the solar filter only after the bright solar surface is completely covered. Replace it before totality ends and before direct sunlight returns. Monitor exposure during totality. Auto mode can keep the target visible, while manual mode gives more control but requires active adjustment.
If you are not fully confident in the filter procedure, leave the filter attached and concentrate on safely recording the partial phases.
8. End the session safely
After the eclipse:
- stop the recording;
- confirm that the files have been saved;
- point the telescope away from the Sun;
- remove the solar filter only after the optics are no longer aimed at the Sun;
- export or back up the files;
- power down and pack the equipment.
Preparing for eclipse day: photography checklist
Safety
Bring:
- a proper solar filter in a protective case;
- certified eclipse glasses for visual observing;
- lens caps;
- a lens cloth and blower.
Inspect the solar filter again before packing it. Check for scratches, holes, loose edges, or damage to the mounting system.
Camera equipment
Pack:
- your camera, phone, lenses, or smart telescope;
- a sturdy tripod;
- a remote shutter release or intervalometer;
- low-tack tape for securing focus rings, zoom rings, and cables;
- a small flashlight for packing after a sunset eclipse.
Confirm that every camera, lens, adapter, cable, and tripod plate is compatible before leaving home.
Power and storage
Prepare:
- fully charged batteries and spares;
- a power bank or external power source;
- empty memory cards or enough built-in storage;
- backup storage if you plan to record a long timelapse.
Test the memory-card write speed and calculate how much storage a full eclipse recording will require.
Camera setup
Before eclipse day:
- turn off the flash;
- disable unnecessary automatic functions;
- shorten or disable image review if it interrupts bursts;
- synchronize the camera clock;
- decide whether image stabilization should remain on or off when using a tripod;
- save your partial-phase and totality settings in advance, if your camera supports custom modes.
Test the complete setup under real sunlight rather than indoors.
Personal essentials
Bring:
- water and food;
- sunscreen, a hat, and suitable clothing;
- rain protection or warm layers if required;
- any seating or shelter needed for a long partial phase.
Avoid major app, firmware, operating-system, or camera updates immediately before the eclipse unless they are essential. A changed menu or unexpected bug can ruin a rehearsed workflow.
Solar eclipse photography: frequently asked questions
How do you safely photograph a solar eclipse?
Attach a solar filter securely over the front of the camera lens or telescope aperture, use the rear screen or electronic viewfinder, and practice the filter procedure before the event. Never point unfiltered magnifying optics at the visible Sun.
Can I photograph a solar eclipse with an iPhone?
Yes. An iPhone works best for wide landscapes, people, changing light, crescent shadows, and video during totality. For a direct image of the solar disk during a partial phase, securely cover the active camera lenses with an appropriate solar filter.
Can a solar eclipse damage my phone camera?
Prolonged direct sunlight may damage a phone camera sensor, particularly when optical zoom or an external lens concentrates the light. Use a suitable solar filter for direct solar photography.
Do I need a solar filter for eclipse photography?
Yes. A proper solar filter is required during all partial phases and throughout an annular eclipse. It may be removed only during totality, when the Sun is completely covered.
Can I use eclipse glasses as a camera filter?
Eclipse glasses are designed for direct visual use, not as a general camera or telescope filter. Use a securely mounted solar filter made for optical equipment.
Where should a solar filter be installed?
Place it over the front of the camera lens, telescope, or binocular aperture. Do not put a solar filter behind magnifying optics where concentrated sunlight and heat can damage it.
What lens is best for solar eclipse photography?
A 200 mm lens produces a recognizable solar disk. A 400–600 mm lens provides a larger image and more detail while remaining manageable. A shorter lens is better for landscapes, landmarks, and people.
What are the best solar eclipse photography settings?
For filtered partial phases, start with ISO 100, f/8 to f/11, and roughly 1/500 to 1/4000 sec. During totality, remove the filter only after the Sun is fully covered, and bracket shutter speeds from about 1/1000 sec to 1 sec or longer.
How do I photograph a total solar eclipse?
Photograph the partial phases through a solar filter. During full totality, remove the filter, use RAW, keep one aperture and ISO, and bracket a wide range of shutter speeds to capture prominences and different parts of the corona. Replace the filter before direct sunlight returns.
Can I remove the solar filter during an annular eclipse?
No. A bright ring of the Sun remains visible throughout annularity, so the filter must stay attached for the entire eclipse.
Can I photograph a partial solar eclipse without a filter?
No. Even a thin exposed crescent of the Sun is bright enough to damage eyes and optical equipment. Keep the filter attached throughout a partial eclipse.
Is the Seestar S30 Pro good for solar eclipse photography?
Seestar S30 Pro is a convenient option because it can locate, center, track, focus on, and record the Sun through an app. Its photo, video, and time-lapse modes are particularly useful for a long partial phase. Always use the dedicated solar filter.
How to photograph a solar eclipse: bottom line
Successful solar eclipse photography begins with one rule: keep a proper solar filter securely attached to the front of the optics whenever any part of the bright Sun is visible.
A phone is best for landscapes, people, and the atmosphere around the eclipse. A camera with a 200–600 mm telephoto lens is better for a detailed solar disk. A smart telescope such as Seestar S30 Pro (US Store | EU Store | Global Store) can simplify locating, centering, tracking, focusing, and time-lapse recording.
Test the filter and exposure on the ordinary Sun. Focus manually. Shoot RAW. Bracket widely during totality. Leave room for the corona. Bring spare power and storage. Most importantly, rehearse the entire workflow before eclipse day.
Location planning will be especially important for the August 12, 2026 total solar eclipse, when the Sun will appear very low above the western horizon across much of Spain and the Balearic Islands.
Use Sky Tonight to check the exact eclipse circumstances for your location, preview the Sun’s path with Time Machine and AR mode, and find a clear observing site before the event begins.
Plan your solar eclipse photography ahead
Solar eclipses occur only a few times a year and are visible in certain areas. Plan your next trip by knowing exactly where the eclipse will be visible with our infographic on next eclipses.